


After you have confirmed you’re exhibiting at Seafood Expo Asia, you will receive an email in the next 1-3 business days from [email protected]. This email will contain all of the information you will need to login.
After you have received your email, go to https://businessmatching.seafoodexpo.com/ to login to Jublia. If you are having trouble locating your email after 4 business days, please reach out to [email protected].
The platform has a simple navigation menu with three options:
Explore is the platform landing page
Meet is the business matchmaking portal with search and filter functionality, meeting requests you’ve received and meeting requests you’ve sent.
Planner is your custom page with calendar availability and notification preferences.
Click on Planner to view your options.
It is important that your indicate your available meeting slots and confirm your schedule before exploring the platform. This will ensure that all your meetings are scheduled in your available time frame.
You can edit your schedule by clicking Planner. To adjust your availability, just cross or tick by clicking to set your available and unavailable time slots.
Click Confirm button to save your schedule.
Navigate to the Meet page to begin viewing participating suppliers and their products. You can narrow down your search list by typing in the search bar or selecting the provided filters. Available search criteria includes: company name, job title, country, product, and species.

When you’ve found a company or individual of interest you can select Bookmark to save their information for later. The bookmarked profile will be stored in Planner > Bookmark section.
All meeting requests require mutual confirmation from the other party. This means you should send out your meeting requests early so you’re more likely to find a mutually available time before the time slots begin to fill. Don’t worry if you don’t hear back immediately, the other party will be reminded on a timely basis (depending on their notification frequency). You will be notified once they’ve accepted and your calendar will be automatically updated when a time is agreed upon.
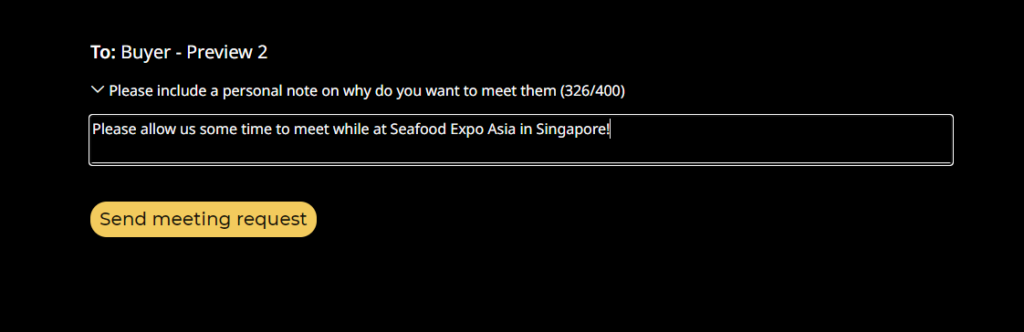
To send a meeting request to someone of interest,
All of your sent meeting requests will appear under the Sent tab on the Meet page
 |  |
Meeting requests are personally sent to you by other participants in the Business Matchmaking program. Depending on your notification settings you will receive an update when another party sends a meeting request.
To view a list of requests:
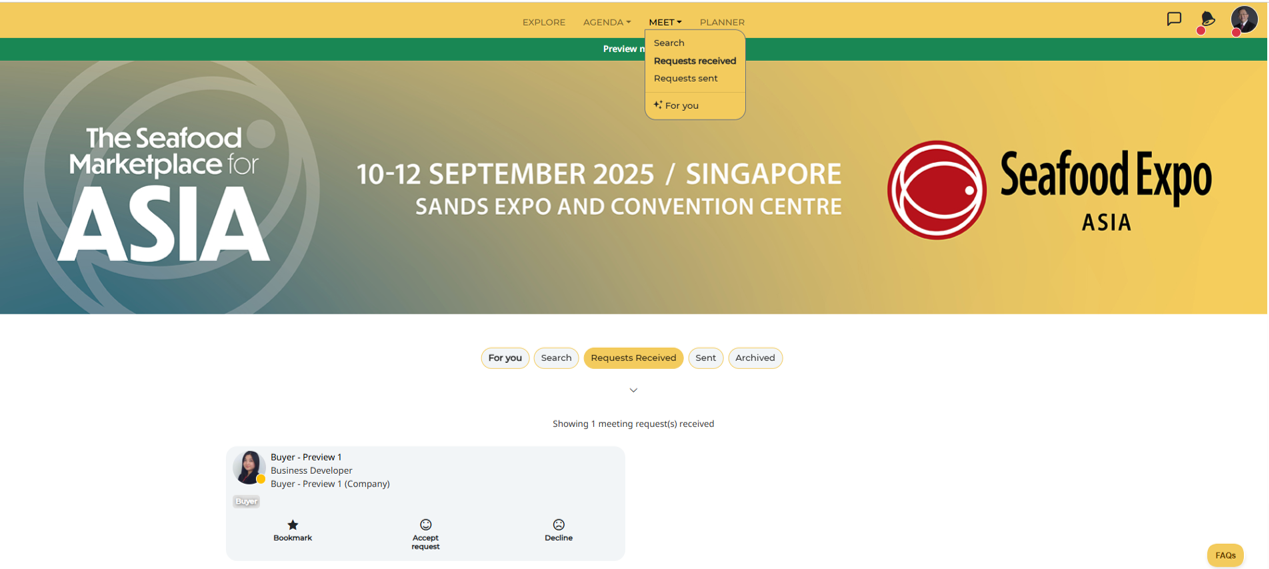
If you determine that a prospective meeting will not meet your business needs you can opt to decline a meeting.